AI Product Photography Tools for Every Listing
Three focused tools cover the core jobs of product photography: a studio shot of one item, a group scene of several, and a realistic shadow for a cutout. Here's how to tell which one you need.
Tools in this category
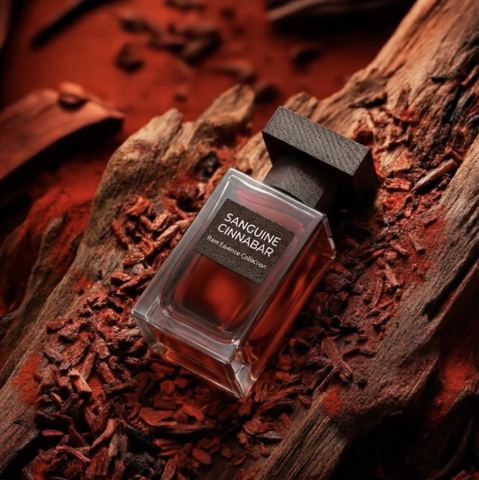
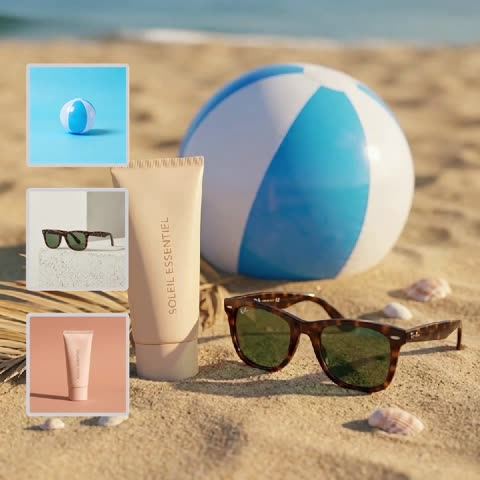
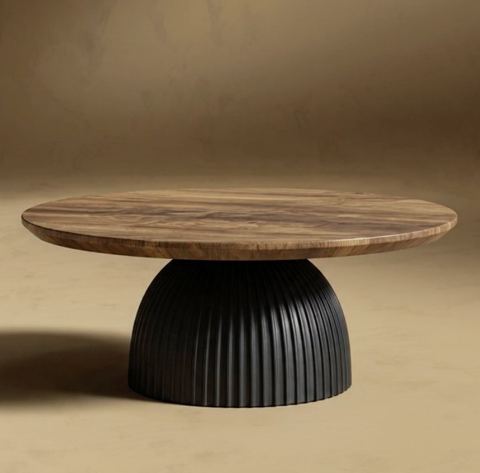
What this AI product photography category covers
Most product image work falls into three buckets. You have a phone photo of an item and need a clean studio shot. You need several products together in one frame for a bundle or a collection. Or you already have a cutout on white, but it looks pasted on and seems to float.
Each bucket has its own tool here: Product Photoshoot, Product Composition Builder and Shadow Creator. None of them asks for a prompt or settings. You upload images and run. All three share one rule: the product's shape, label and colors are kept, and only the surroundings change, whether that's the background, the lighting, the arrangement or the shadow.
Which tool to use: a quick decision guide
One item, clean background: use Product Photoshoot. Upload a single photo and get a seamless backdrop, soft studio lighting and precise reflections and shadows. It's the workhorse for main images and for catalogs that need every SKU to look the same.
Two to five items in one frame: use Product Composition Builder. Upload one product per image, and the model arranges them into a single scene with consistent lighting, matching shadows and a clean, brand-style background. It solves the classic problem of products shot at different times on different surfaces that never quite match when you combine them by hand.
A cutout that floats: use Shadow Creator. It leaves the image as it is and adds a soft contact shadow where the item meets the surface, plus a cast shadow from a single light source, matched to the surface in your photo. Reach for it when the picture is basically done but still looks like a composite.
A simple product photo workflow, start to finish
Shoot every item on your phone near a window, whole and centered, with some margin around the edges and the label facing the camera. Run each photo through Product Photoshoot. You now have a consistent set of studio shots, one per SKU.
Those shots make ideal inputs for Product Composition Builder. When the source images already share a look, the combined scene comes out more cohesive, which is handy for gift sets, bundles, variety packs and colorway lineups.
Keep Shadow Creator for the leftovers: supplier images with the background removed, older catalog photos, or cutouts a designer has already placed in a layout. One run returns one image. If you don't love it, run a variation and pick the best; glass, chrome and glossy packaging usually deserve two or three tries.
Ecommerce product photos for Amazon, Etsy, Shopify and eBay
On Amazon and eBay, most categories expect the main image to show a single product on white, which is exactly what Product Photoshoot is for. Composition shots belong in secondary gallery slots or A+ content, where showing what's in the box helps shoppers decide. Always check your category's current image rules.
On Etsy and Shopify you have more freedom. A clean hero shot per product plus one group image per collection makes a storefront feel intentional. On Instagram, TikTok and Pinterest, a lineup of products with matching light announces a launch better than a string of mismatched posts, and consistent shadows keep an older catalog from looking dated next to new arrivals.
Pay as you go, in the browser or on Telegram
Tokion runs in any browser and in a Telegram bot. You pay per generation, with no subscription, and new accounts get a starter balance to test all three tools on real products.
The same balance covers every image tool, chat with dozens of models and the API, so you can generate the photo and draft the listing copy in one place.
Who it's for
Amazon and eBay sellers
Turn phone shots into clean main images, then add bundle shots for the rest of the gallery. Every listing gets the same studio look.
Etsy makers
Candles, ceramics, jewelry and soaps get a polished finish without a light box. A whole collection can live in one cohesive group photo.
Shopify brands
Build a uniform catalog even when products were shot years apart. Group scenes work as collection banners and email headers.
Designers and agencies
Ground cutouts with a natural shadow before dropping them into ads and decks. Pitch a client's product line with a quick group visual before any studio day.
Pro tips
- Decide on item count first: one product goes to Product Photoshoot, two to five go to Product Composition Builder.
- For compositions, upload one fully visible product per image. Overlapping or cropped items are harder to arrange cleanly.
- Run each SKU through Product Photoshoot before building a composition. Matching sources give the most consistent lighting.
- For Shadow Creator, use an image that shows the product's base and leaves room around it for the cast shadow to fall.
- Shoot in daylight rather than under warm bulbs so colors stay true across all three tools.
- Compare every result with the real product before publishing. Color mismatch is a common reason for returns.
Good to know
- You can't choose the background color, props, camera angle or light direction; these tools have no text fields.
- A composition fits up to five products. For a larger line, build several themed scenes.
- Shadow Creator doesn't remove or replace the background. Clean up a busy source with Product Photoshoot first.
- Check small print, ingredient lists and barcodes against the original, and confirm marketplace image rules yourself.
Questions
What's the difference between Product Photoshoot and Product Composition Builder?
Product Photoshoot takes one photo and returns a studio shot of a single item. Composition Builder takes two to five photos and combines those products into one scene with shared lighting and shadows.
Product Photoshoot already adds shadows. Why use Shadow Creator?
Product Photoshoot rebuilds the whole shot: background, light and reflections. Shadow Creator keeps your image as is and only adds a contact shadow and a cast shadow, which is ideal when you're happy with an existing cutout.
Will the AI change my packaging or logo?
All three tools instruct the model to keep the product's shape, label and colors accurate. Only the surroundings change. Still, proofread fine print before you publish.
Where should I start if I'm launching a new store?
Start with Product Photoshoot for each item. Those clean shots become your catalog and also the best inputs for group compositions later.
Can I add props or a lifestyle setting?
Not with these tools; they produce a clean studio look. For styled scenes with surroundings, browse the ready-made product ideas in the Business section.
Can I use supplier photos?
Yes, as long as the image is sharp and you have the right to use it. Heavily compressed images give less detail, so ask for the original file.
Does it work on my phone?
Yes. Use the mobile browser or the Telegram bot, upload straight from your camera roll and download the result.
How much does AI product photography cost here?
You pay per generation with no subscription. Each tool's current price is shown on the page, and new accounts start with a starter balance.